You can use BigMailer webforms to collect emails and any other subscriber data completely for free. You only have to subscribe and pay when you start sending emails above the limit on a free plan.
This article outlines how to use BigMailer forms on your site, but you can also build landing pages with forms in BigMailer that can be hosted on our URL or your own custom URL (e.g. lp.yourwebsite.com).
How to Create a Webform in BigMailer
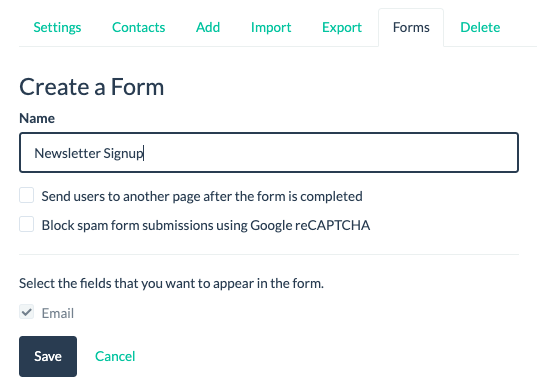
First, you need to create a List that you want to collect your data into, then click on the arrow down icon next to your List name and select “Forms” in the options menu. On the next page click “Create Form” button, give it a name and select the fields you want to use for this form.
If you want to collect additional fields in your webform you need to define them on the Fields page first – click on your brand name in site header and select “Fields” in the options menu. See section about field management below.
To protect your webforms from bots signing up for your emails you have the option to add reCAPTCHA to your forms during the form creation step (see screenshot).
You have 3 options for using BigMailer webforms:
- You can host your signup form on BigMailer and just use the URL we provide.
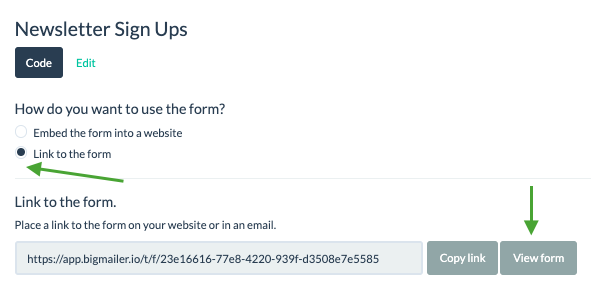
- Embed the HTML code BigMailer generates into your website. You may need to customize the style of the form to make it fit the appearance of your website.
- Use BigMailer landing pages built with a drag-n-drop editor and add styled forms.
Securing Your Forms
If your website or forms aren’t properly secured, your confirmation or other automated emails can be used for list bombing.
Email or list bombing occurs when bots flood an email address with hundreds of emails to distract from important emails and hide financial fraud. Any senders with automated emails like DOP, welcome, or RSS can be abused with a list bombing attack, resulting in poor deliverability for the sender.
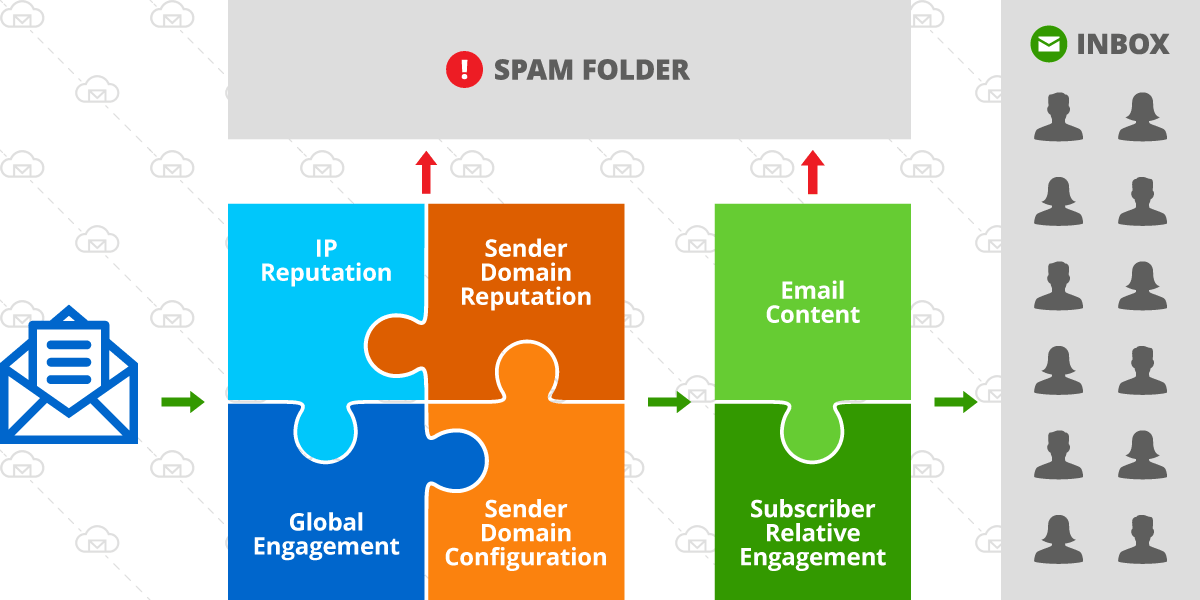
Make sure your site uses SSL and HTTPS and consider enabling reCaptcha on your webforms to prevent bot signups. You may still get smart bot signups, so if you see a big spike in your list size you should promptly investigate. You may be able to identify patterns in bot signups and use segmentation to filter those out from your welcome or DOP emails.
Managing Fields
There are 2 ways to create new fields in BigMailer:
- Add them on the Fields page (under your brand name in the header) before importing or collecting data.
- Create new fields during an import where you can map your columns to new fields you define.
Once you define fields they can be used to:
- Generate a webform to collect data outside BigMailer platform
- Customize your email template with use of merge tags.
- Segment your audience on campaigns or exports
You need to select a correct data type for each field you create, so you can use appropriate operators (equals to, greater/less than, etc) when segmenting on those fields during campaign creation.

You should add some sample values for all fields, they will be used as merge tag values in any test emails you send. Without these sample values your test emails that use merge tags can go into Spam folder or not get delivered at all.
Adding Your Webform in WordPress
If you use WordPress to manage your website you will need to use a HTML module type to add webform code to a page. Most WordPress installations and themes have this module type.
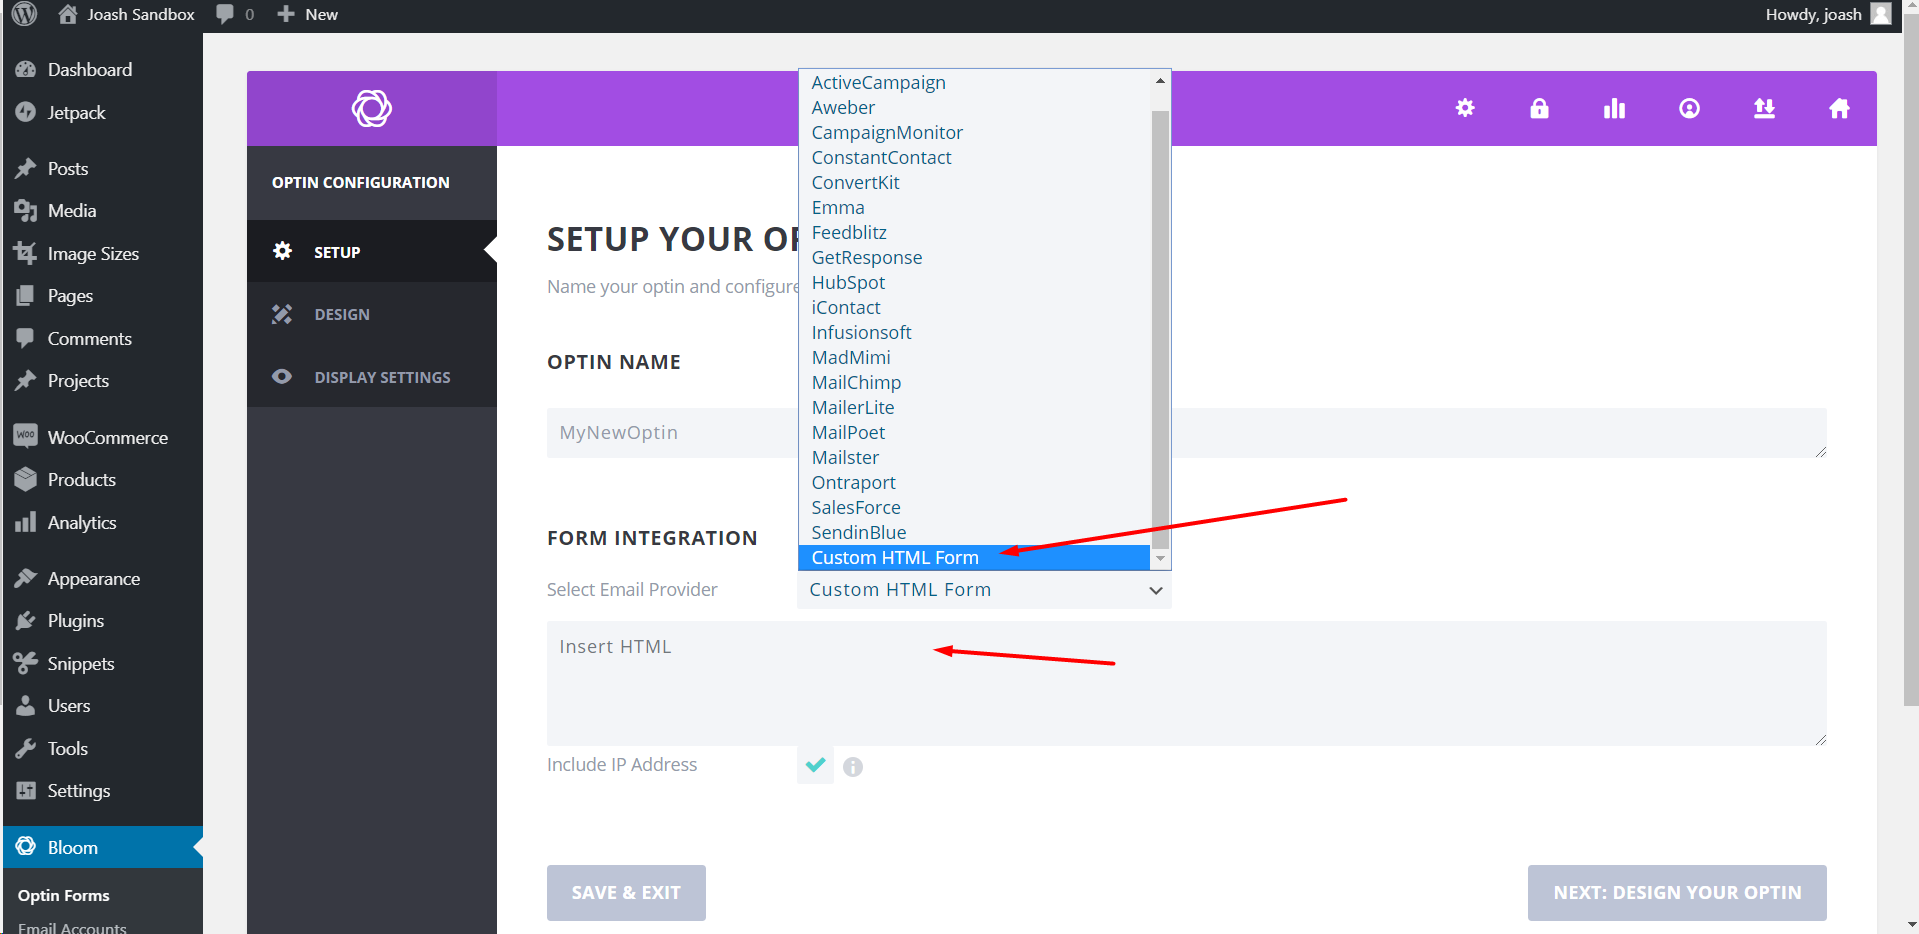
You can integrate BigMailer forms with Bloom plugin from Elegant Themes using the “Custom HTML Form” option.
If you are using WPforms you can use this plugin to integrate with BigMailer forms.
Customizing Your Webform
By default, BigMailer HTML webform code is un-styled, so you need to customize it to add relevant styles to the code, typically just a class attribute on the form and each field.
If you want to use a different input type you would need to modify the code. A common need for converting input type is to change a field into a dropdown with answer selection. You can change the element name from text to a select type, see example of the HTML code for a dropdown field. Just make sure to keep the field name that was generated by BigMailer.
You can also customize the confirmation message provided to any text you would like or redirect to another page on your website after successful form submission.
If you are not comfortable with HTML code, consider building landing pages with forms in BigMailer using a drag-n-drop editor.
Happy list building!