Before we explore setup of a custom tracking domain in BigMailer, let’s clarify what is a tracking domain and how it is used.
What is a Tracking Domain?
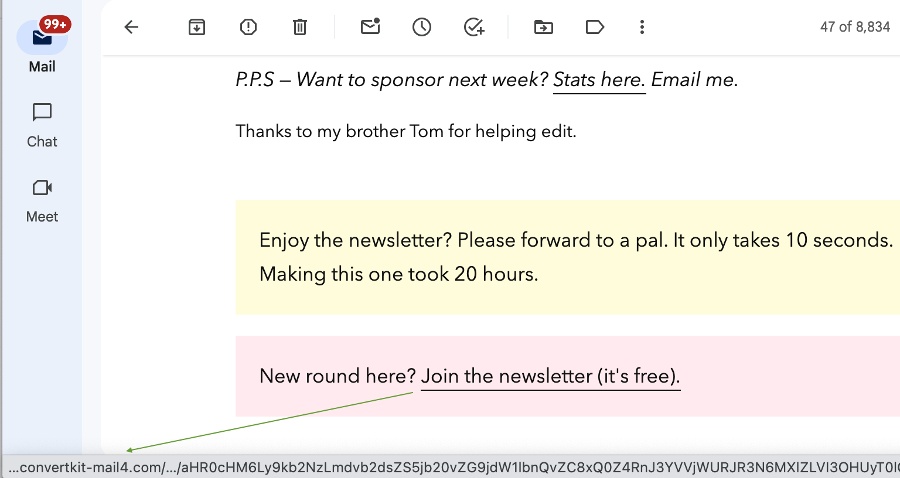
In order for ESPs like BigMailer to track clicks on links in the emails, the links have to go through another URL that redirects the user to the final destination. You can see your tracking link when you mouse over a link in an email that was sent from an ESP (not a 1:1 personal email).
Most ESPs have more than 1 tracking domain, but they are all shared by many customers. This can be a problem if a low quality sender sends spammy looking email in large volume – the shared tracking link can become toxic and its presence can affect other senders using it.
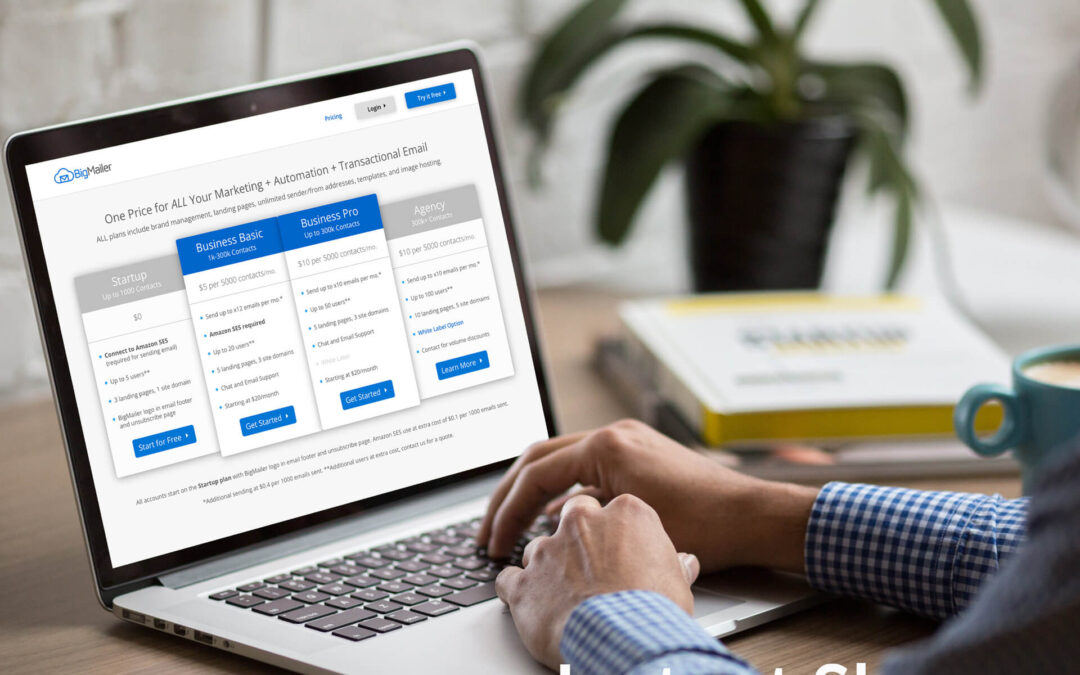
In BigMailer, the click-tracking and unsubscribe page URLs are set by to share tracking domains by default. They are not explicitly referencing BigMailer.io brand or identifying BigMailer as your email marketing service provider, for example customers on the free plan may see bml.co as their tracking domain.
Why Use a Custom Tracking URL?
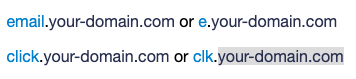 When the URL in the email links (the tracking domain) matches the sender domain, it makes the email appear more authentic to mailbox providers and can improve your deliverability and inbox placement. Your tracking domain can use any new sub-domain for this, for example email.your-domain.com or click.your-domain.com. BigMailer customers can set up custom tracking domains to anything they would like for free, and without any assistance/support. This option is available at no extra cost on all plans, because we believe in enabling our customer success. Just make sure to select a new and unused sub-domain, or you can disrupt your existing service by creating a new CNAME record for a sub-domain already in use.
Custom Domain for Unsubscribe Page
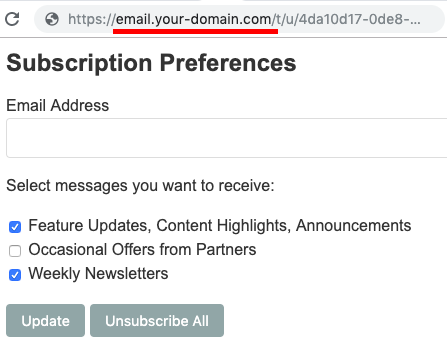 On BigMailer platform, when a custom tracking domain is defined for a sender it is used for both, email link tracking and for hosting the Unsubscribe page.
You can customize the unsubscribe page further by:
- Adding a logo under Brand settings page. It will be the first element to appear on the Unsubscribe page, above the brand name.
- Adding message types to help manage email subscription preferences.
How to Set Up Your Custom Tracking URL
Your sender records can be found:
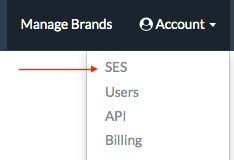
1. Under Account link in the top right of the site > SES link in the menu, if you use your Amazon SES connection to send emails
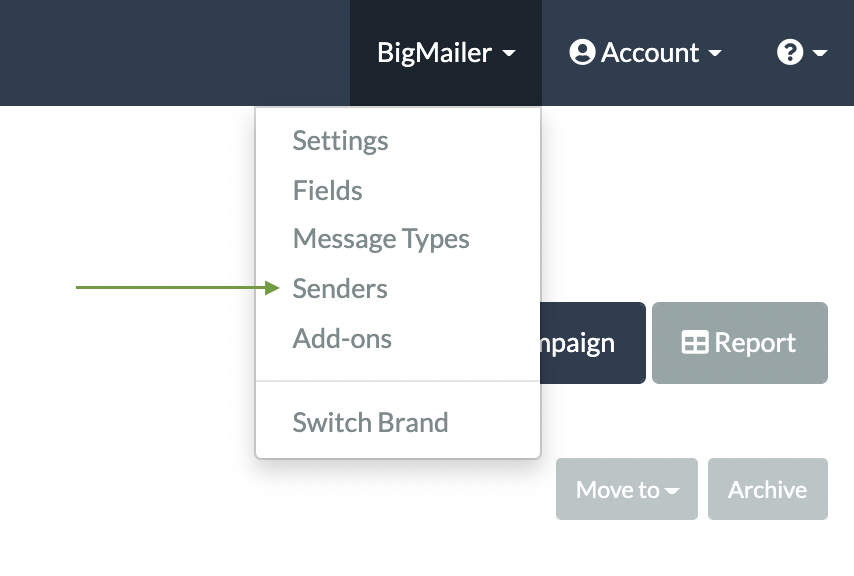
2. Under your brand name link in the header > Senders link in the menu, if you are on a Pro/Premium plan
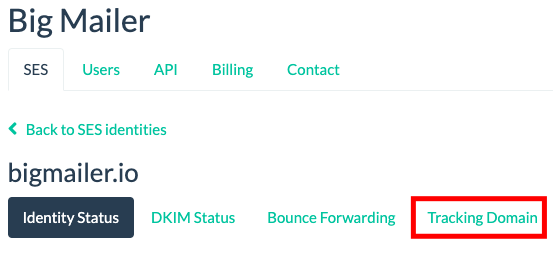
Click on the sender domain you want to add a custom tracking URL to and look for the tab “Tracking Domain”.
Follow instructions on the page – choose your tracking sub-domain and get DNS records BigMailer will display.
To enable custom tracking for a subdomain, you would need to update DNS records for your domain, specifically add a new CNAME record pointing your new subdomain to BigMailer. The tracking domain must be a subdomain (like email.your-domain.com) and can’t be a root domain (like your-domain.com). Make sure to choose a very short sub-domain that’s not already in use. For example, if you add email as your tracking sub-domain and it’s already used by another service you could disable that service by replacing a CNAME record for that sub-domain.
Where to add DNS records
DNS records are typically managed by domain registrar. Here are some provider documentation links:
It usually takes 1-2 hours for a tracking domain to automatically verify and BigMailer will start using the new link automatically.
White-label Option for Agencies
BigMailer offers a white label option for customers on Agency plan. With our white label option your clients would access the platform on a site that is branded for your organization and you can charge your clients based on your own pricing model.
Have any questions or need assistance? Please use chat icon once logged into your account.